

If you’re a WordPress website owner or you work on one, then you have already heard of Featured Images. Heck! You might even use this vital component every single day.
In WordPress, Featured Images are used in more than one way, and that all depends on the theme which you are currently rocking. With the help of featured images, one can add representative images to posts, pages, or custom post types.
Since the official launch, the featured images have become so popular that each theme developer came up with its unique, exciting, and attractive layouts.
Although theme developers and WordPress itself have made getting used to featured images quite simple, this component as a whole is a little more on the tricky side. For instance, you will have to make sure that those primary images look good across all themes and devices.
It’s time for you to understand featured images in detail and learn how you can play with it.
What are Featured Images in WordPress?
Featured images are just like any other WordPress media files, but the fact that it acts as a primary representation of your content gives it a special status. Apart from high-quality content, the featured images are the next thing that you need to focus on.
This feature boosts your website’s overall visual quality and at the same time, attracts visitors to your content. You might have also seen the use of featured images on social media networks. Now that the featured images are so popular, almost every other WordPress theme comes with more in-depth support of it.
If you don’t know how to add featured images to your posts or pages, then you can follow the guide given below.
- Open your post to which you want to add a featured image.
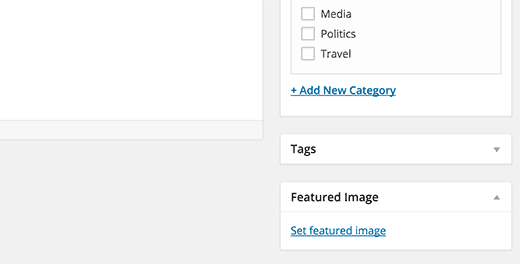
- Scroll down until you find the Featured Images section on the right sidebar section.
- Now, click on the section and then select the “Add Featured Image” option.
- Select the already uploaded media file or add the new one at the same time.
If you’re not able to see the featured image option, then you can follow the steps given below.
- Scroll up and look for the Screen Options tab.
- Select it and then find the Featured Images box on the list.
- Make sure that option is checked.
How to Change Featured Images Size in WordPress
When it comes to a visually appealing website and content, you can not just add a featured image to the post or page and then forget about it. You have to make sure that the image looks good with each theme as well on every device.
Although most of the WordPress theme now offers immense compatibility of featured images, you should still be aware of a few of the things. Here is how you can change featured images size in WordPress.
Method 1: Change Featured Images Size in WordPress Dashboard
This is the first and foremost method to change the featured image size in WordPress. Above all, this might be the easiest one you can find. All you have to do is change the default size of the featured image. Here is how you can do that.
- Open up your website’s WordPress dashboard.
- Head over to Settings>Media option.
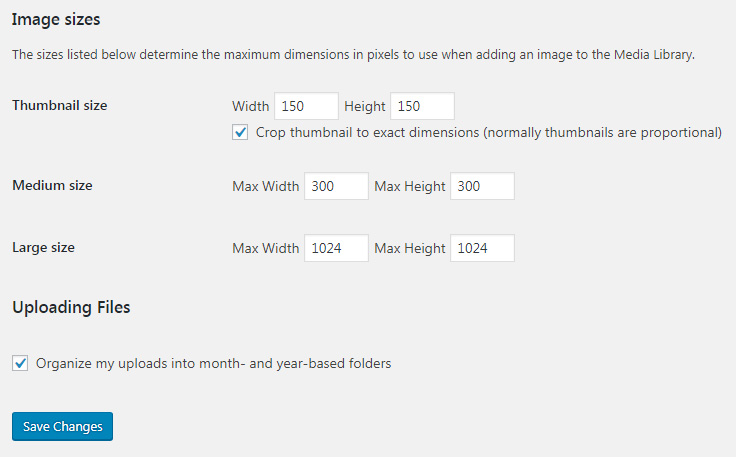
- Look for the thumbnail size option inside the Image Size settings.
- You can now change the Width and Height in pixels.
Now, WordPress will use this size for all the uploaded images so you should decide the thumbnail size by considering numerous factors such as theme compatibility and visual appearance.
Method 2: Change Featured Images Size using Plugin
The first method works flawlessly for all the image uploads from the moment you applied the new settings. But, what about all those sizeable media libraries which you already have.
You can’t just go ahead and re-add each one of them since that will take forever and will eat up a significant chunk of your time. That’s where you can make use of the below-mentioned WordPress plugin.
- One of the best plugin for this task will be the AJAX Thumbnail Rebuild. You can either download the “.plugin file” from the link, or you can directly install it by heading over to Plugins>Add New>Search.
- Once installed, you have to activate the plugin to make use of it.
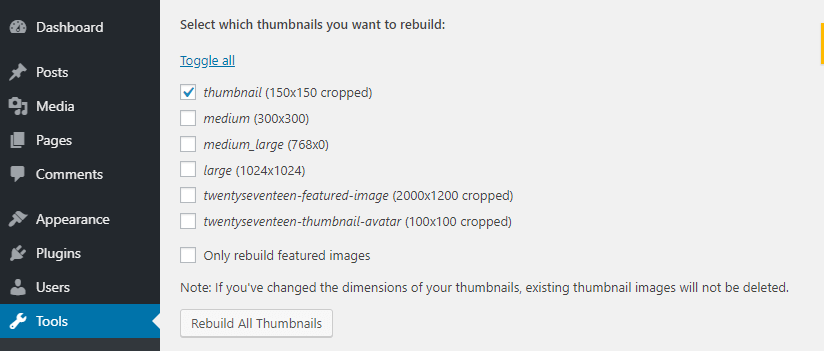
- Now, head over to Settings>Rebuild Thumbnail to access the plugin options page.
- Click on Rebuild All Thumbnails. This will resize all of your thumbnails to the default size.
Note: The entire rebuilding process can take a while, depending on the number of images. It is recommended to wait for the whole process to get completed.
Method 3: Change Featured Images Size using Functions.php
For those who’re unaware, whenever you add a media file to WordPress, the platform resizes it to three different dimensions, namely thumbnails, medium, and large. Although you can change the dimensions of thumbnails by heading over to settings option, you can also add a few more default dimensions.
If you’re going to be using a particular image size very often, then we will recommend doing this to save time for your next upcoming posts.
To add custom image sizes, you will need to tinker with the functions.php file, which is hidden inside the core WordPress files. You can follow the step-by-step guide discussed below.
- Using a File Transfer Protocol (FTP) Client, connect to your website’s host address to access the root folder. FileZilla is one of the most popular free FTP client.
- Once the connection is achieved, head over to the wp-content/themes folder and look for your theme name and open it.
- Now, look for the functions.php file. Once you do, right-click on it and hit the Edit option. The file will now open up in the local text editor.
It’s time to make some changes to the code inside the function.php file. Since we’re playing with the core theme file, it is recommended to pay close attention to what we are doing. Don’t add lines of codes that are not discussed here.
Back to the file, we don’t have to remove any existing code instead we will be adding a few lines at the end of the file. Scroll down to the extreme bottom and paste the code given below.
// This enables the function that lets you set new image sizes
add_theme_support( 'post-thumbnails' );
// These are the new image sizes we cooked up
add_image_size( 'post-image', 660 );
// Now we register the size so it appears as an option within the editor
add_filter( 'image_size_names_choose', 'my-custom-image-sizes' );
function my-custom-image-sizes( $sizes ) {
return array_merge( $sizes, array(
'post-image' => __( 'Post Images' ),
) );
}
In the above code, we have created a new default that goes by the name post-image. In this example, we have predefined the width of the image while WordPress will automatically select the proportionate height.
You can add your own image size but always remember the layout – first is the width and then height. For instance, in add_image_size( ‘post-image’, 660,480 ); 660 is the width while 480 is the height.
You can follow the above code to add as many custom sizes as you want. We have added comments in the code so that you can understand every single line and what it does.
Well, that’s it for this article. If you have any doubts or queries, you can let us know in the comment section below. We’ll be happy to help.
